
How to Set Up a Marine Antenna Correctly
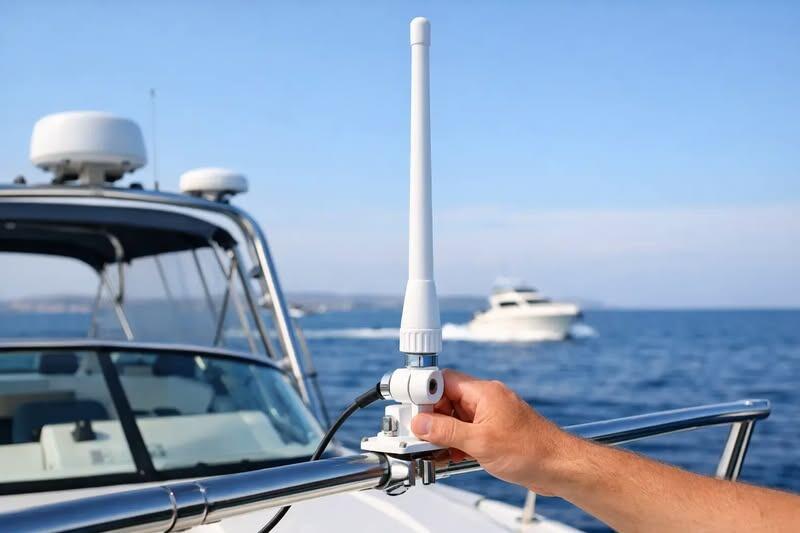
A marine VHF radio is only as effective as the antenna system connected to it. A well-specified fixed radio with a poorly mounted antenna, damaged coaxial cable or corroded connector can have a much shorter working range than expected. Knowing how to set up a marine antenna properly helps ensure that calls to other vessels, marinas and the coastguard are heard when conditions are less than ideal.
For most leisure and working vessels, this means installing a marine-band VHF antenna, normally tuned for the 156-162 MHz range. The process is straightforward when the equipment is compatible and the cable run is planned before drilling begins. The details matter, however, because water ingress, poor connections and unsuitable mounting positions are common causes of poor VHF performance.
Start with the right antenna and mount
Choose an antenna designed specifically for marine VHF use. A marine VHF antenna is usually a vertical fibreglass whip or a shorter stainless-steel whip, supplied with a suitable mount and either an attached coaxial lead or a fitting for separate cable. Do not assume that a CB, amateur radio or broadcast antenna will work effectively on marine VHF frequencies.
Antenna length is a practical compromise. A shorter 0.9 m to 1.2 m antenna is often suitable for a small open boat, RIB or vessel where it may be knocked or snagged. A 2.4 m antenna generally offers higher gain and can improve communication range, but it needs a secure mounting point and has more wind loading. Higher-gain antennas concentrate the signal more tightly towards the horizon, which is useful on relatively level vessels but can be less forgiving on a boat that rolls heavily.
The mount must suit both the antenna and the vessel. Ratchet mounts are common on rails, cabin sides and masts because they allow the whip to be folded down when passing under bridges or during storage. Deck mounts and rail mounts can also work well, provided they are rated for the antenna’s length and weight. Use marine-grade stainless steel or quality UV-resistant fittings rather than lightweight general-purpose brackets.
Select the best mounting position
For VHF, height is normally more valuable than transmitter power. Marine VHF signals are largely line-of-sight, so raising the antenna increases the distance to the radio horizon. A masthead installation can provide excellent range on a yacht, while a cabin-top or radar-arch position may be more appropriate on a motorboat.
The ideal location is as high and clear as practical, with the antenna upright and away from metal structures, solar panels, radar scanners and other antennas. It should also be placed where it will not obstruct movement on deck or be repeatedly struck by sails, fishing gear or covers.
Avoid mounting a VHF antenna directly beside another transmitting antenna. Separation reduces the chance of interference and limits the amount of transmitted RF energy coupling into neighbouring equipment. Where several antennas must share a confined space, follow the equipment manufacturers’ separation guidance and consider the operating bands involved.
A metal hull or metal superstructure does not necessarily prevent a good installation, but it makes mounting and cable routing more important. A typical marine VHF whip is designed to work with its own matching arrangement and does not always require a separate ground plane. Check the antenna instructions before adding an earth connection or altering the mounting arrangement.
Plan the coaxial cable route before fitting anything
The coaxial cable carries the radio signal between the set and the antenna. It is not simply an extension lead. Every unnecessary join, sharp bend or water-damaged section introduces loss, and at VHF those losses can quickly reduce the benefit of a good antenna.
Measure the proposed cable route from radio to antenna, allowing enough extra length for a service loop at the radio and antenna ends. Do not pull the cable tight. A small amount of accessible spare cable makes future inspection, radio removal and repairs much easier. At the same time, do not leave large coils of cable hidden in a locker. Use the shortest sensible route.
Keep the cable away from engine ignition components, high-current battery cables, inverter wiring and sources of heat. Where it must pass through a bulkhead, deck or cabin roof, use a proper cable gland or deck fitting that seals against water ingress and protects the outer sheath from chafing. If a hole is drilled through a GRP surface, seal the exposed material as appropriate before fitting the gland.
Do not kink coaxial cable or bend it more tightly than its specified minimum bend radius. Secure it at sensible intervals with clips or ties that do not crush the cable. On a mast installation, ensure the cable cannot slap against the mast internally or be pulled tight as the mast flexes.
Fit and protect the connectors
A sound connector is essential. Marine VHF installations commonly use PL-259 connectors, although some radios and antenna systems use other connector types. The connector fitted to the radio must match its socket correctly. Avoid forcing adapters together simply because they physically appear to fit.
If you are fitting a connector to coaxial cable yourself, use the connector type and cable size recommended by the manufacturer. Prepare the cable carefully, ensuring the centre conductor does not short to the braid and that the braid is properly terminated. A poor soldered or crimped joint may work intermittently at the berth, then fail after vibration, salt spray and temperature changes.
External antenna connections need weather protection. Use appropriate self-amalgamating tape or a purpose-designed weatherproof boot, applied over a clean, dry connection. The aim is to prevent water tracking down the cable and entering the connector. Ordinary insulating tape alone is rarely a lasting solution in a marine environment.
Before connecting the radio, inspect the full run for crushed sections, exposed braid, loose fittings and places where water could collect. If the antenna came with a factory-fitted lead, avoid cutting it shorter unless the manufacturer specifically confirms this is acceptable. Some antennas rely on a particular cable type or length for correct matching.
Connect the radio safely
With the radio switched off, connect the antenna lead to the VHF antenna socket and tighten it by hand. Do not use pliers on the radio connector. Check that the antenna lead is connected to the VHF, not an AIS, FM or GPS socket on a multi-function unit.
The radio should be supplied from a properly fused DC circuit using suitable cable size and clean terminals. Although this is separate from the antenna installation, poor power wiring can cause voltage drop, noise or unreliable transmission. Keep radio power leads direct and tidy, and follow the radio manufacturer’s installation instructions.
If the set includes DSC, programme the correct MMSI number and connect GPS position data where required. DSC is an important safety feature, but it depends on correct configuration as well as a functioning antenna. Never use an MMSI number allocated to another vessel.
Test the installation before relying on it
A basic receive test is a useful first check. You should hear local harbour, marina, weather or routine VHF traffic where available, although a quiet channel does not automatically indicate a fault. Check that the display, speaker and squelch control are working normally.
The more meaningful test is a controlled transmission check. In UK waters, make an appropriate radio check with a marina, harbour authority, coast station or another vessel where local procedures permit. Do not make repeated radio-check calls on Channel 16. Use the designated working channel or an agreed channel instead.
An SWR meter or antenna analyser can identify a mismatch, high resistance joint or damaged cable before it becomes a problem. This is particularly worthwhile on a self-installed system, after replacing coaxial cable, or when there is any doubt about performance. Do not transmit for extended periods into an untested antenna system, and never transmit with no antenna connected.
If range is disappointing, resist the temptation to assume the radio is faulty. Start with the simple checks: connector condition, cable damage, antenna mount, correct antenna type and battery voltage under transmit. A specialist inspection can often isolate the issue quickly, whether it is a connector repair, cable replacement or a better-suited antenna installation.
Maintain the antenna system through the season
A quick visual inspection before launching and during routine maintenance can prevent a communication failure offshore. Look for cracks in the fibreglass whip, loose mounts, rust staining, damaged cable insulation and tape that has lifted from external joints. Move the antenna gently to confirm the mount remains secure, but do not overtighten fittings into GRP or thin aluminium.
After winter storage, check the connector at the radio and any exposed junctions before the first trip. Saltwater and condensation can travel surprisingly far inside a cable, and a green or white residue around a connector is a warning that attention is needed.
The best marine antenna installation is not necessarily the tallest or most expensive one. It is the one that is correctly matched, mounted securely, routed carefully and tested before it is needed. If you are unsure about compatibility, cable termination or fault-finding, Radioworld UK can help you select the appropriate marine radio accessories and support a dependable installation that remains serviceable long after the first voyage.
Go Back